This has been a tough week for me, partly because I get frustrated easily by parts that don't fit. Not a good trait when building a custom pro-touring car. Perhaps a little odd as well since I do like a challenge. Tomorrow there is a car show in Forest Park for only original cars, I guess for people that like to take the easy route. This week I was somewhat wishing I had done that, but I'm sure it will be worth the pain some day.
Starting off this week is something that did work well. I ordered a custom driveshaft from Brent Crownover at Driveshaft Specialist Incorporated in San Antonio. We talked through my plans for the Chevelle, and he recommended a 3.5" aluminum driveshaft. His price was very reasonable, they shipped it out in less than a week, and you can see it fit perfect. Obviously I can't say how it drives yet, but based on my interaction I would definitely recommend them if you need a custom driveshaft. It should be plenty strong and with less weight spin smoothly at highway speed.

Next is on to the steering. I've read lots of different reports on what fits and what doesn't, so I wasn't quite sure how this was going to go. I went with a pretty stock setup, only changing the steering box to a 93-98 Jeep Grand Cherokee. It's a direct bolt up to the frame, so that part is good. The steering linkage runs into the exhaust headers and alternator, but more on that later. With difference in the oil pans, motor adapter plates, sway bars, and steering parts, there are many combinations you could end up with. My kit uses an Addco sway bar that comes very close to the idler arm.

With the box in place, I pulled off the Jeep pitman arm, and tried to fit up my new Chevelle part. Here was the first problem - CPP sent a manual steering box Pitman arm; I need a power steering box part. The difference is the hole attached to the box is a different size. Jill says the tech on the phone was arguing with her until she read the part number back to them. I guess they didn't believe that they had shipped the wrong part. Hopefully when we get the correct power steering pitman arm it will fit without issues.
All of the steering parts are new from CPP. The tie rod ends are much beefier than original. Obviously I'm guessing on alignment (probably could measure front and back of wheels and get somewhere close); with the new parts it appears that they will be right at the edge of being able to adjust properly to get the toe in correct.
The sway bar came as part of the pro-touring kit from CPP and is an Addco part. It is much larger than the factor bar, and looks to have lots of universal parts. The bar itself appears to be of high quality.
The holes in the brackets for the sway bar needed drilled out so they would fit the factory holes in the frame. Also Addco did not send bolts, so I had to make another stop for new bolts. It felt cheap that they would not include new bolts. I powdercoated the gold cadmium plated brackets to cover the grinding, and they looked ugly. Much better in all black, although I may need to go back and touch up all of the bolts with black later.

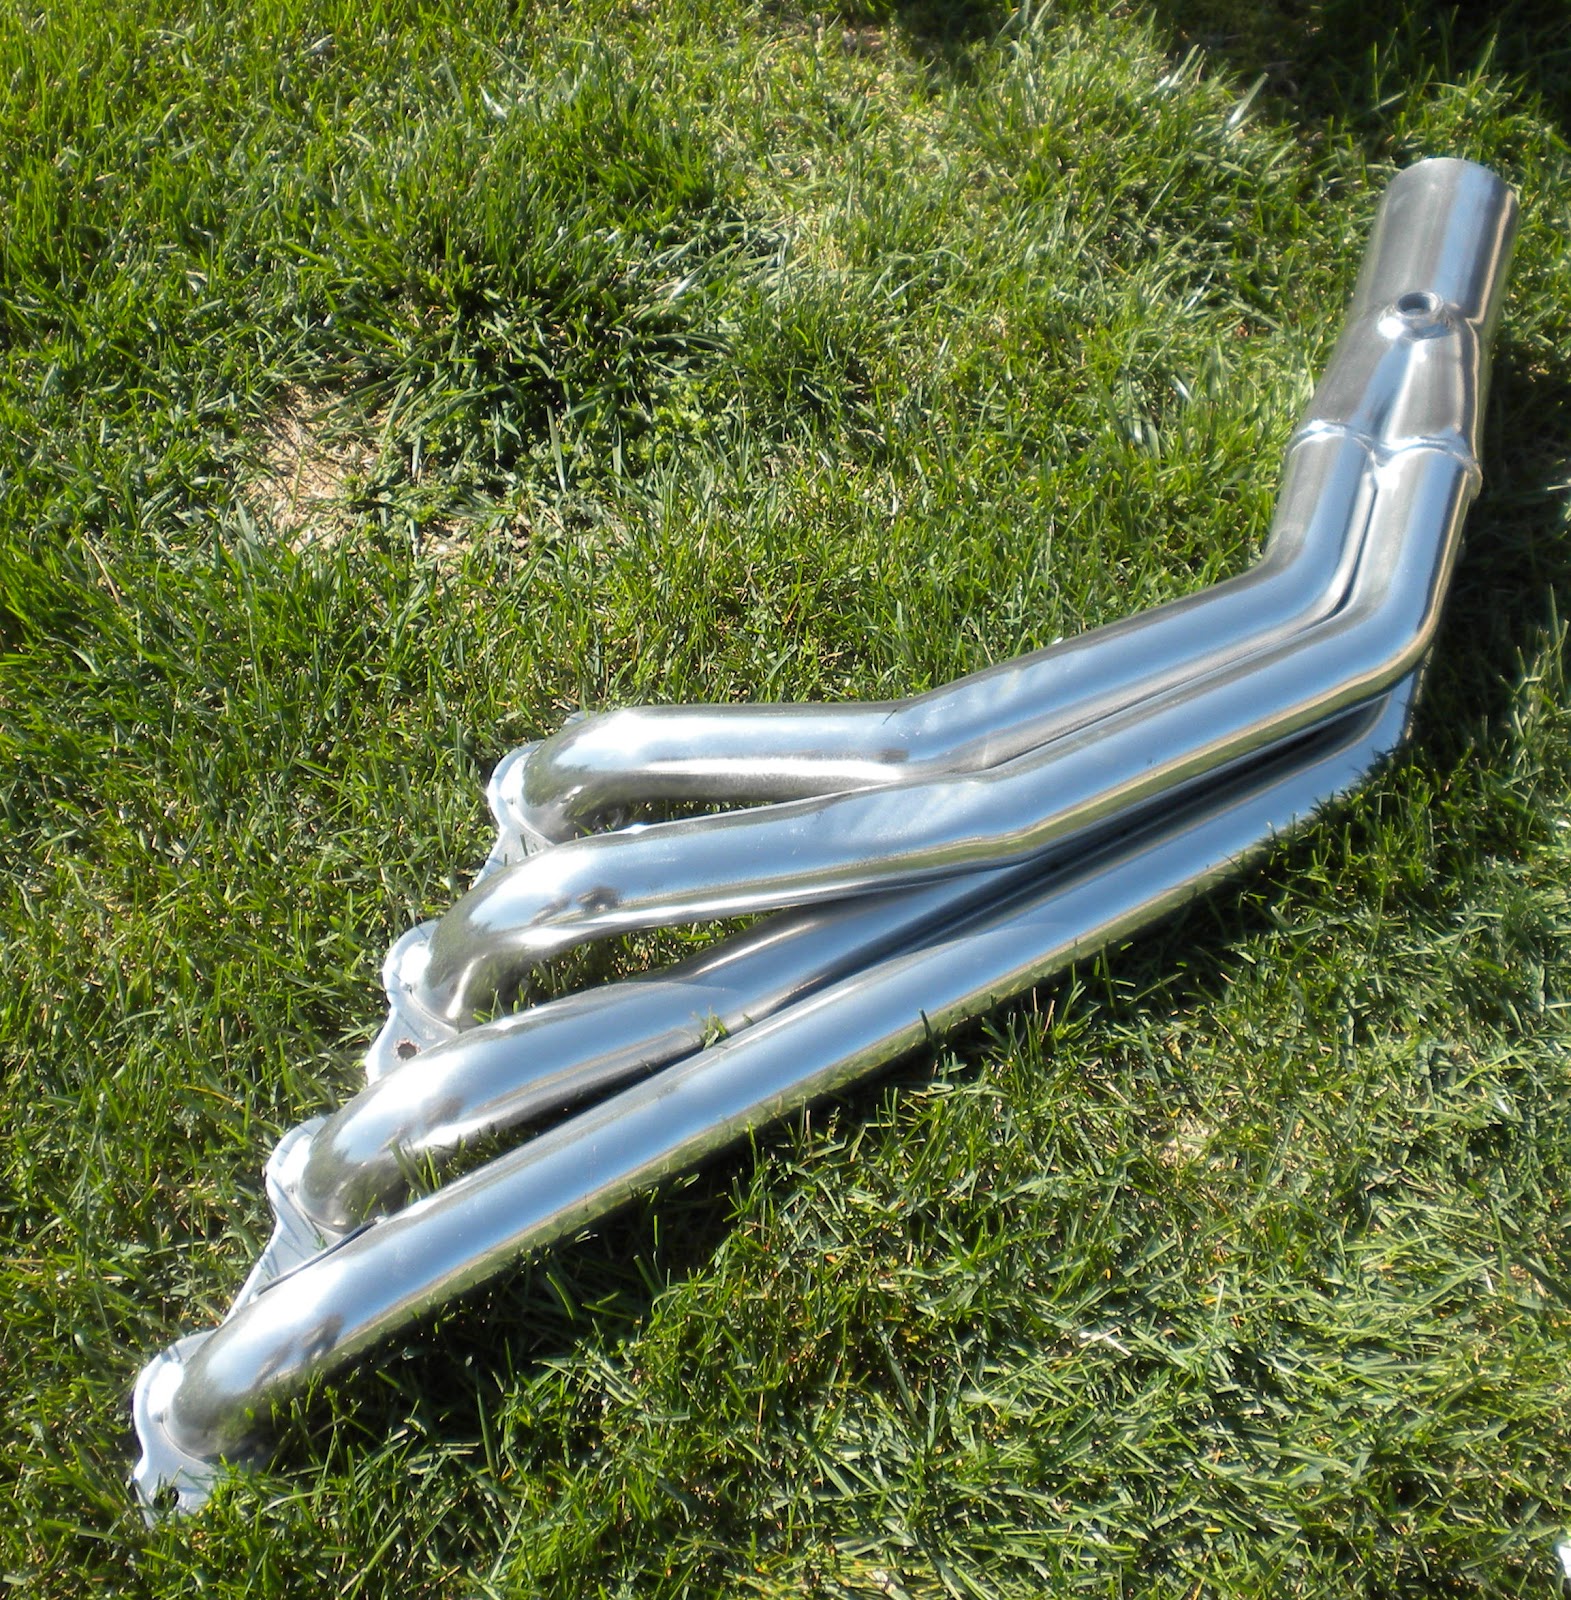
With the steering in place, next step was the headers. I purchased a set of Dougs Headers (from Petronix) specifically made for this swap, so I'm thinking no problem fitting them. Well, the drivers side appears to tuck nicely and should allow the steering linkage to fit properly with the LS1. That part is good. The quality of the headers is also excellent. Problem is now on the passenger side, where the header hits the bellhousing and the frame. I see Holley now makes a cast header that fits nicely to the block. If I had a chance to do it over, I think I would have purchased the Holley header because it looks like it would save some of these headaches. I cannot recommend Doug's Headers if you are doing this swap. Hopefully if any car guys are reading this you can give me some tips or let me know how much of a problem these will be.
To get the drivers side header to fit, I used a large socket and a 3lb hammer to dimple the tubes. In the picture you can see what needed to be done. The right side needed pretty much the same treatment. Thankfully the ceramic coating is very tough and took the 'adjustment' well without cracking.

The next three pictures show the final fit. There is probably 1-2 mm at the narrowest point. I'm a little worried as the motor flexes under acceleration that it will bump, but hope that under normal driving there isn't enough vibration to cause a problem. There is tons of room on the left side that the header could have been made tighter to the block. There is no excuse for a design this bad that I can see. I also don't like that the O2 sensor bung faces outwards. There is plenty of room on the inside by the transmission, and it would have made a much cleaner look. Yes, it is under the car, but still I want everything nice and tidy. Sure, I'll admit I'm a perfectionist. They show under car cameras at Barrett Jackson (not that the Chevelle would ever be there), so people do care about the underneath.
Okay, on to the right side. The header hits the bellhousing by the starter. There is lots of extra meat here, so a few minutes with a grinder and...

...this is what I came up with. Sharp eyes will notice the piece I removed at the bottom of the picture. Looking at a few forums this seems to be a common modification, so plenty of space here. Tip for anyone trying this - install the starter now. Don't so it after putting the header on like the direction say. It will go on, but it's not fun.
And again the final result after lots of test fitting and pounding. You can see on the bellhousing side there is now plenty of room. The starter solenoid is a little close for my comfort, so hopefully it is designed to take the heat. If I have any hot start issues later, I'll know why.
The starter wiring needs to go towards the front of the car, underneath the header. It looks obvious now where it should go, but trust me as it's going together sometimes obvious isn't quite what you think.
The dipstick goes back in the middle of the header. So, here comes the final problem - only six of the eight plug wires fit with the header. The wires have an aluminum shield to keep them safe from the heat, and on the second plug back from the front on both sides, it hits. If it were flexible, all would be good, but last I checked there isn't a lot of flexibility in aluminum tubing. Any suggestions? Not sure how I'm going to solve this problem, but I figure that is for another day. New plugs first, since it will never be easier to change them.

And the final product. Driver side too close to frame, passenger side is close on both sides, two plug wires don't fit. It doesn't look like there is any chance they will hit the floor as many report with other headers, so that should be good. They should make these a little lower to the ground so they would easily go under the transmission crossmember. I guess whomever makes the exhaust will get to deal with this. Notice plenty of space for O2 sensors on the inside, but bungs to the outside. Man the frame rails on an A-body are narrow! Hopefully next week finish up the steering and on to trying to make the floor fit.


