Coming together

Coming together
Getting close to paint

Saturday, December 31, 2011

The frightening Flintstone stage

More reverse progress this week. A friend came by and cut the floor out, and exposed more rust in the drivers side rocker area.  The good part is this is in front of the rocker that shows, behind the fender area.  I may work to replace this part as the body work will not have to be perfect since it is hidden.  A wire brush works great for removing the rust without removing metal, and is hard enough it exposes thin areas in the metal.  This is the the beginning of the part that is hardest on me - to see the car cut up into pieces.  Maybe because it is the stage that irreparable damage can be done, but it has to be done to get solid metal back in the car. The passenger side did not look bad, but we decided to cut out a larger section to replace an area full of pinholes in the metal.  It also removes a factory seam, so should be stronger in the end.  Factory seams are only spot welded, and the repair panels will have full length welds holding them.
The new panels are inexpensive thankfully, but there is a lot of labor getting them to fit properly, cutting out old rusted metal, and welding in the new without warping any sheet metal. We will need the body on the frame to know where to put the transmission hump.  It needs to be a couple inches taller, which is why we cut the tunnel out in this picture. We stopped cutting at the floor braces, so we don't impact where the body mounts to the frame.  The original pieces look okay from what I can see, with just surface rust, so by avoiding them we should maintain the shape of the car and make it easier when mounting the body.  The trunk area isn't so lucky. Hopefully it will not be long before I can share pictures of the new floor in place.
Here is a closeup of the drivers side after I cleaned away the rustiest bits.  The panel open in the middle bottom was full to the top with rust (inside the rocker).  Amazingly the inside of the rocker itself is not rusty.  Go figure how that happened.  There were multiple layers of steel here, which I think helped keep the moisture in.  There aren't patches made for this area, so I am thinking to make one single plate (thinner than stock) to cover over the whole area.  By removing the layers I hope that this will stay rust free in the future.  I don't think that it needed the strength of the thicker steel, and the only thing I can say for sure that the multiple welds we add should improve the strength, even if we use 22ga instead of 16ga steel.

Tuesday, December 27, 2011

Merry Christmas to me, and a story for you

I drove up to Iowa after Christmas to go rummaging through the garage for old Chevelle parts.  More on that trip below, but I thought I would start with a little story behind the car.  We dug through some old newspaper clippings about how the Chevelle came to be where it is at today.  The clipping below is from the Washington Evening Journal, June 14, 1965. The circled article is about the Chevelle; it reads 

"Accident. - A 1965 model car driven by Bennie B Gray of Smith Center, Kansas, was totally demolished Friday at 2:30 p.m. when it ran into the side and under a truck driven by Gerald Gene Bender of route three Washington.  Sheriff's officers investigated the crash which occurred as Bender was turning his truck, owned by Lee Drollinger, into the driveway at Farm Service of Washington. The Kansas car was attempting to pass the truck at the time.  Treated for minor injuries were two Smith Center men, passengers in Gray's car: James Myers and Dennis Sutton."

The article to the right is about the marriage of Betty Louise Peters to Bennie Bryan Gray.  James Myers was an usher in the wedding.  It must have been intentional to put these articles side by side in the paper, don't you think?


After the accident the Chevelle ended up at Van Dyke Company in Cedar Rapids (top car in the add below).  Compare 'totally demolished' in the newspaper report to 'Will drive' in the advertisement!  Different perspectives, certainly.
 We also found the original license applied for tags.  It's amazing to me the miles this car accumulated in the first year.  It was being built in January of 1965, and Bennie B. Gray managed 9000 miles before the accident in June.  The car was restored after July 12, and was up to 16,000 miles by the end of 1966!  Imagine this on a car with no power steering and no power brakes.  They tell stories about how the Chevelle did not tune well stock, and needed timing set to +16.  In the short time Gray had the car, it seems that he had recurved the distributor, cut holes in the air cleaner, and possibly put a cam in the car.  All we know is it was fast.
 In a future trip I'll look for photos for the following life.  We talked through stories of the Chevelle at the Gulf of Mexico, in San Diego at the Golden Gate Bridge, racing on the salt flats in Bonneville, and playing around at night before the windshield was in.

My fun was looking for parts in the garage.  Below may look like a pile of dusty parts to you, but it is an incredible find to me.  The boxes are literally falling apart; I need to repackage or get the pieces on the car.  We found brand new, OEM rocker panels, wheel well arches, hood front molding, and a grill center.  There are lots of other trim pieces from parts cars that we think may fit the Chevelle,  but we can't be sure until they are cleaned up and matched to the car.  Hopefully we can find at least one of each molding in good shape.   These parts would be impossible to find as OEM today, rather you would buy remanufactured parts that will not fit as well or look original.  It appears that Hoss bought these from the dealer in 1973 in anticipation to restore the Chevelle.

 There were also some nice original parts, many hard to find.  There is a glove box molding, shifter boot, and a steering wheel in perfect shape.  This may not sound like much, but you cannot find this wheel as a reproduction, and I have never seen one come up for sale. I really like the look, and will probably try to use this on the car if possible. We also found the dash top mounted clock, a rare accessory for 1965.  I saw one on eBay listed for $1,199.  That seems high to me, but gives you an idea what people think these are worth.  These parts will be a huge plus when we get the car ready to go back together.


Tuesday, December 20, 2011

Rear axle R&R

A quick update today; Sig's finished up the rear axle rebuild with all new bearings and seals, as well as installing the Powertrax limited slip.  Comparing the final result to the picture, you will see everything is new except the axle, axle shafts, and ring and pinion gears.  Keep your parts if you ever restore a car - that little bracket you see at the top of the axle holding the brake lines is $45 to replace!  Thankfully I have most all of the original parts in the basement so finding and cleaning this little parts is reasonably easy, and saves me some money. 
I did not show the tear down, but you can see what we started with in the picture above.  Several broken bolts, lots of rust, wasp nest, and those annoying upper control arm bushings added to the enjoyment.  I found a slick method on Youtube if you ever have to replace the bushings:
http://www.youtube.com/watch?v=UPXf1OR9Lnk

Below are a few pictures of the rear end assembly.  The brake kit is from CPP as part of the Pro-Touring Stage 3 kit.  They calipers dropped right on (after painting), although one of the three t-bolts does not work with my axle.  I bought a 3/8 grade 8 bolt instead for one position that solved the problem. I don't know why they use t-bolts, a regular bolt would be easier and work better.  The instructions were terrible, but thankfully there isn't a lot of ways you could do this wrong.  I don't think that I found one, at least that I can tell at this point.
 Next step was installing the new cover. It isn't necessary to have aluminum, but doesn't it look cool?  This is one of those things that I have always thought helps set the rear look of the car, a little bit of jewelry under the bumper.  Two quarts of Royal Purple gear lube filled the case; I will check the level once the axle is in the car.
 Here is a better look at the disc brake that replaced the stock drum setup.  They won't fit behind the 14" wheels, but I'm planning on at least 17's for the final ride.
 The springs are new, with refurbished spring seats.  This is about as far as I can go without the frame.  You need a BFH to put the bushings back in, and that is easier done in the car.  With new seals, disc brakes, and posi-traction, the rear axle should give excellent performance for the next 50 years.  Just don't ask what this part alone cost ;)  It is where the rubber meets the road, so money here is hopefully well spent.  It felt good to empty out a couple boxes from the basement.  Hopefully the frame will be ready soon and I can empty a few more!

Friday, December 16, 2011

Thinking about colors

 I know it's early in the process, but I've been thinking a lot about color this week.  Maybe because I'm to a point where I need the help of others to move the project along.  The original color is Madiera maroon.  I like the car in this color, but it's just so common and we have the opportunity to go with something a little more lively. Value wise, I'm not sure if it makes a difference, but I'm not planning to sell this anytime soon.  Since the car will be repainted top to bottom, the time is now to decide if we go with something different.  You don't want to rebuild and change your mind later, because it is next to impossible to get in all of the door jams and little crevices without starting all over again.


My first choice today is something in the family of a black cherry pearl/dark maroon metallic. I have wanted a street rod in this color since I was a teenager.  You could argue black cherry pearl should be reserved for a '49 Mercury and have a good point, but I don't have one of those. Scion has a series of this color called 'Black Cherry Pearl', 'Blackberry Crush', or 'Sizzling Crimson Mica'.  At least in pictures this looks like a great color, you don't see it often, and would be a modern interpretation of the original maroon.  The Scion below is in the sizzling crimson mica.
My favorite color has always been in the dark blue family.  I think the '66 Chevelle looks amazing in this color, but for some reason I don't care for it on the '65.  I'm not sure why since they are so similar.   Chevy's 'Imperial blue' comes pretty close to what I call midnight blue metallic. The GTO is also available in something similar, so chances are if Chevy made a Chevelle today, it would get this color from the factory.
I've seen a few pictures of Chevelle's in dark silver metallic, like the one below.  I love '65 Chevelle's in this color, and if I were to branch away from maroon, this is the color I would go for.  The picture shows one with the molding's painted (yuck), but the silver really sets off nice against the polished stainless trim.  I may not be the most exciting of the set above, but it has a nice elegant and sleek look appropriate for a Chevelle.  Write me a comment and tell us your thoughts.


Saturday, December 10, 2011

Powdercoating new parts

More piecewise progress this week.  The rear axle is back from painting and off to get the axles back in.  It looks nice cleaned up and powdercoated.

 Parts from CPP for the brakes and suspension came in various coatings and prep, so I decided to take the time to strip them down and either paint or powdercoat before they are installed.  I think this will keep them from rusting as quickly, and get's everything to a nice uniform finish.  The spindle on the left is bare, the right spindle is in black powdercoat.
 I think the brakes turned out nice.  The top is the finished product, the bottom row is how they arrived.  I powdercoated the gold cadmium plated parts black, and used a silver caliper paint on rest.  No gaudy red for me.  How did red caliper paint catch on anyway?  You see it on new cars, and mostly it just looks tacky, IMO.  I like the subtle silver that will blend in behind the wheels.

Sunday, December 4, 2011

Let the rebuilding begin

 Last weekend with the help of my neighbors, I finished stripping the body down to the bare bones.  In the picture you can see the only parts left that could be removed are the windshield and deck lid. I guess more will come off, but those parts have to be cut away, not just unbolted! So here is what I have to work with - a good shell from a rare original '65 Chevelle Malibu SS.


The passenger side floor is solid,
 but the drivers side needs a small patch in the footwell and up into the cowl area.
The trunk is in poor shape.  It doesn't look that bad, but it is full of pinholes and will need to be completely replaced. 


 I found Gateway Muscle Cars in Moscow Mills last weekend, and met a couple great muscle car fanatics.  We spent a couple hours just talking cars.  I brought home a new trunk floor and drivers side floor.  The trunk pan is so big I had to bend the piece to the right down to fit it in our van.  Thankfully we will not be needing that part, since it is not rusted on the car.  The rest of the pan will be used to replace the floor.

 This weekend was spent powdercoating old pieces that I have sandblasted.  For those that do not know, powdercoat is essentially a powdered plastic that you apply with an electric charged spray, and melt in an oven to cure.  It is a lot more work than spray paint, but makes a fairly permanent, rock resistant coating. It is much more durable than paint.  One can from Eastwood doesn't go very far, and it took me the better part of yesterday just to do the parts you see below.  I think it will be well worth it in the end.  The parts at the top are originals that have been cleaned and coated.  All of the suspension pieces and trim that is not stainless will get this treatment.  I need opinions on what color to do the new brake calipers; red, black, silver, or high temp stainless?
 I put the new park lights and coated bracket into the original front bumper.  I'm very happy how this looks.  Unfortunately one of the first pieces restored will be the last to go back on.
I test fit a bracket from Speedway Motors to relocate the alternator, and the good part is that it fits the alternator well.  Unfortunately it does not work with the engine lift mount in place, so I cannot install it just yet.  The GTO power steering pump looks to be about 1/2" wider where it mounts to the block, so I will need to pick up a pump from an F-body ca. 2002.  I'd rather use the GTO pump since it has a remote reservoir for the fluid, but that would require precise modification of the bracket.  Anyone want to trade an F-body pump for a GTO pump?

Friday, November 25, 2011

Old projects come and gone

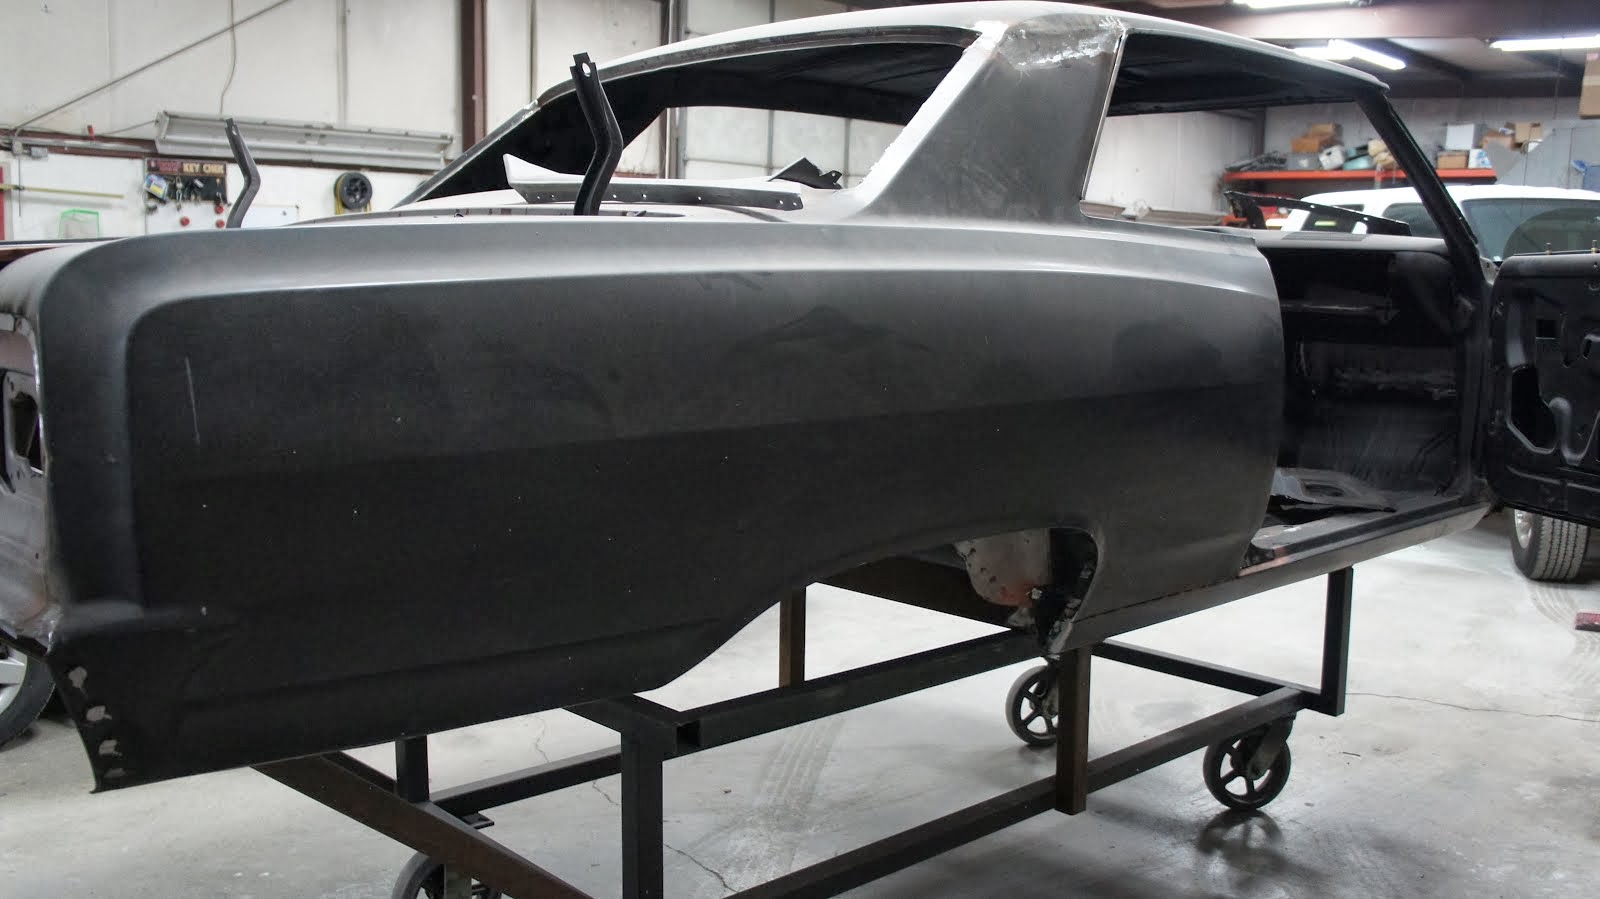
I will never cease to be amazed how auto body shops and mechanics can do this type of work day in an day out. It truly must be a passion for what they do. Or maybe just my personality - I want to be finished, but need things to be perfect, so it's hard to start a project where the finish line is so far off.  I guess it is no wonder so many car projects get started and never finish. I have a clear vision of what the Chevelle will be, stock on the outside, nice modern interior and reliable, safe engine, steering and brakes. How does one stay motivated day ofter day when there is only reverse progress towards this goal? I do need to get friends more involved, because it is more fun when you have someone to work with so it is more socialization than work (see the RX7 below).

Case in point, yesterday I took apart the drivers door and got down to the weatherstrip molding.  From working door to empty shell and a box of parts. I know it needs to happen, but I keep thinking, how about a rat rod? But that's not me.  I hope there is a good assembly diagram to put all of the parts back together.  Is it odd of all the bits so far the doors are what have me most worried to reassemble?

I thought it would be fun to make a quick trip down memory lane of my past major projects for those that might not be familiar.  My first project was a '53 Chevy 3100 truck.  I really wanted a project, and had looked at a '68 Buick Wildcat 2-door, '68 Camaro sitting in my parents in law's back yard (they wouldn't sell it to me, too much work needed!), and then this:

 The bad picture is all I have, and the bed is already off.  It was winter and I was so excited to get started.  I had no money, (okay a little) but plenty of enthusiasm.  I remember driving it how with no heater, and a 216 cubic inch motor with a 4-speed that topped out at 40 mph.  I took it to body shop classes at Kirkwood to learn how to do body work, and hired someone to do the motor.  I learned so much on this project, and probably more what not to do.  I should have done this the other way around, engine myself and body to a shop, what we are doing with the Chevelle.  The shop welded on a '79 Camaro front subframe, which in 1990 was the way the swaps were being done.  Terrible idea.  A 350 ci Chevy small block was installed.  I went off to college, and the project ended because of time and money.  Jay and John Kurth picked it up for a while, and eventually it was sold to someone who was going to finish the project.
 Here is the one picture I have of John showing Jay and I how to install the rear window.  Sorry John for roping you into this project. You were a great teacher and I am fortunate for everything you taught me.
 This is how the truck looked when I had to stop.  Obviously not finished. I did do all of the body work that you see, not bad for a first try, but also not great either. I love the lines on these old Chevy trucks. Note the blue Geo Storm paint, you will see it below.

The next project was born of necessity.  Jill and I had big greyhounds and no money, so we needed a big vehicle to take them to the park.  We found a '79 Suburban 3/4 ton 2WD USDA-spec for $600 and got started.  It was a basket case and should have been in the junkyard.  It had been beaten hard and never drove right, even after we replaced everything in the suspension and steering. I could never figure this out, and to my credit, neither could any mechanic that looked at it. Again terrible pictures, but you can see a before and a 90% done picture.  I think the only parts I salvaged were the hood, rear side doors, and roof.  I had the wood bed parts left from the '53, so I used those to build the bed floor.  I bet this was the only suburban with a wood bed floor.  I rebuild the 350 motor and did all of the body work myself.  It turned out okay for something I did in my garage.  I even painted it in the garage, and Jay helped me polish it out. We found replacement 16.5" wheels (yes, 16.5") and I powder coated them myself.  They turned out great.
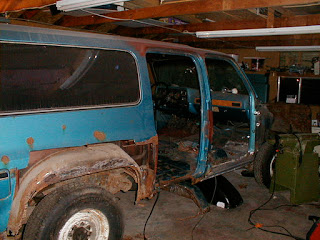
 Just to prove it ran, here we are in the Badlands with the new motor and body work done.  I painted the hood and doors before we drove it to Oregon, using the left over paint that was meant for the '53. On our way back from this vacation, one of the wheel bearings seized on the interstate.  Thankfully Jay was driving and his lightning reactions prevented us from having a serious accident.
 Oregon projects were limited to engine work.  I had learned by now I was better at bolting things together, and didn't have the patience or skill to do body work well.  Andrew bought a '93 Rx7 and an LS1 motor, and said we can put the two together.  Well, we did over lunch times with Little Caesars pizza and beer.  It fit and we got it running.  This car was an absolute monster with the LS1.  I think Andrew drove it this way for a few years, and then decided to put in a bigger motor.
 My baby at the time was a '92 Eagle Talon Tsi AWD.  I had been slowly upgrading the the suspension and motor, and it broke a timing belt on the way to the drag strip in Oregon.  At the time it was running 13.1 in the quarter mile.  I rebuilt the motor as a 2.3L stroker with all the goodies and race ported head. We brought it to St. Louis, where I pretty much lost interest in working on cars and focused on work.  There it sat for the next six years.
 This spring I started working on getting the Talon tuned, and drove it a couple times to work.  The transmission of all things was in limp mode (stuck in third gear), but the engine was running really good.  I'm biased, but I think this is one of the nicest 1992 Talon's you will find in 2011.  I sold it for way less than what it was worth for the chance to have the Chevelle.  (Max, I hope you enjoy this car!). Jill says only one project at a time, and I have to admit she is right.

Monday, November 21, 2011

Test fitting the LS1

I'm still in deconstruction mode this week, but getting closer to reassembly. The frame is completely stripped down and ready to get sandblasted and painted.  The big new this week is that I think we have selected a shop to do the body work.  Jack from Specialized Collision stopped by and took a look, and we had a chance to visit his shop.  He has a ton of experience, and was willing to work with us on the project so we don't get overextended.  He has a smaller shop, and only works on a few projects at a time so I don't think the Chevelle will be on the back burner.  He showed us a beautiful (and expensive) '73 Olds that he is working on now.  Someday the Chevelle will be in that like new shape as well. He has loaned us a body cart to use that will be much safer and sturdier than the sawhorse contraption I put together.  Thanks Jack!

 Saturday, Matt (Amanda's husband from work) came over and helped me mock up the motor in the frame.  We installed an LH8 oil pan with a rear sump, I think this comes from a Hummer.  This gives plenty of room for the frame to go under the block.  With the Transdapt motor mounts, the LS1 drops in pretty easily.

 If you have a sharp eye, you will notice we had to take the factory headers off to fit the motor.  They sit very wide on the block, and there was no chance they would fit.  I'll need to find a set that sits tighter on the motor.  Thankfully several companies make headers for this swap, it's just another $700 to spend.

The transmission crossmember was too far forward with the T56.  In the pictures you can see where it would sit slid back 6-7"from the factory position. The engine looks like it sits level in this position, so I think we can modify the factory crossmember to work.  A new tab will need to be welded on to fit the wider T56 mount.  I'll update once we get the motor more permanently mounted as to what we decide.


I purchased a '93-'98 Jeep Grand Cherokee power steering box from AllJeepParts.  It amazed me it bolted in perfectly! The alternator on the GTO motor sits low, and interferes with the power steering box.  I will need to buy new brackets that mount the alternator and A/C compressor high on the block. Another $400 expense. After all this we took the motor back out and will try to get the frame off this week for painting.  When it comes back I can mount up the new suspension and put the motor in for the final (?) time.

Sunday, November 13, 2011

Something is out of place...

I'll let you guess.

Good progress over the weekend. The frame is fully stripped down and ready for sandblasting.  I need Jay to weld four holes where body mounts go that have rusted out, but otherwise I think it is in okay shape. Lots of surface rust.  I bought a kit from ABC performance to box the frame; basically four panels that turn the c-channel in the middle and rear of the frame into a box.  It should be much stronger with these in place.

I hit my first impasse with the rear axle today.  The studs for the shocks broke, so those will need removed and replaced.  I don't think that will be a fun job at all.  Also on the A-body 12-bolt rear axle, there are two large bushings at the top to be removed.  They are rusted in place, and probably need torched out.  Not a big deal, expect I don't have a torch! We now have a big pile for the metal recycler. I wonder if they can go in the regular bin? This weeks imponderable: is it better or worse for the environment to rebuild an old car with new technology, or buy a new car?

There is still disassembly on the body to do, but we are close to putting things back together.  I ordered a new oil pan yesterday, and when that is in I will be able to check the fit of the motor.  The engine adapters from Trans-dapt fit nicely (after finding some shorter bolts for the engine mounts).

Saturday, November 12, 2011

Out with the old!

 I thought I'd start this week's blog with identification of a 1965 SS, now that I'm down to the body tag on the firewall.  All GM products come with this tag that provides information to the factory how to build the car.  It is also critical if you want to restore a Chevelle back to factory specifications.  This is the tag on my Chevelle:

Starting under General Motors Corporation:

01A: Build date, First week (A) January (01)

ST: Abbreviation for Style
65-: Build year 1965
13837: Fisher Body code for Chevelle Malibu SS sport coupe
KAN: Tells you the car was built in Kansas City, Missouri
9608

TR: Abbreviation for Trim
714-: Seat type and color
N-N: Exterior upper and lower colors, Madeira Maroon

E: Tinted Glass
2: Options from Group 2
L: Muncie 4-speed
P: comfort & convenience group, Type A (Malibu)
(inside day/night mirror, driver side outside mirror, 2-speed wipers, washer, back-up lights, glove box lamp, and bottle w/s washer fluid)
R: radio speaker, rear
5: Options from group 5
W: seat belts, custom deluxe, with retractors

So there you have it, 1965 Chevelle Malibu SS coupe, Madeira Maroon, built in the first week of 1965 right here in Missouri.  Might have even been the first one off the line that year?

There are two 4-speed transmissions found in the Chevelle, Saginaw and Muncie.  I understand the Muncie is the one to have.  You can tell the Muncie by the reverse gear linkage in the rear section.  You can see this as the third arm from the shifter linkage in my transmission, showing it to be the Muncie.

I forgot to write down the engine code before I wrapped it up, so all I know is that it is a 327 V8, with **0 horsepower.  According to Min, this is the 250hp version.  This thing is HEAVY!  I pushed it out into the driveway to wash it off, and it tipped sideways.  It took two of us just to roll it back upright, and the engine hoist to drag it back up the driveway.  My side is sore today. The LS1 has an aluminum block and plastic intake, so it has to be lighter.

Halloween!  I thought the zombie baby was a nice touch.


Yesterday I took a day off from work to get a little more done.  I managed with the help of the lift to get the body up on sawhorses and well supported by 2x4s. I also pulled the engine and shrink wrapped it for long term storage.  The consensus from the Chevelle forum was to keep this in case I ever want to restore the car back to original (or if it goes back to Jay in 50 years).  With the engine hoist this isn't a bad job. I was surprised how heavy the engine was because it was so easy to lift out.  Today's job will be to take more of the suspension apart.  There are lots of broken bolts on the body that will need to be removed.  I'm dreading that job, so will be putting it off as long as possible.


 The engine out and on it's stand (before it broke and more 2x4s added for support). Here it will live.

Our big shock this week was the body estimate.  Mudd came in at $24500 for the body work and paint only.  Another phone estimate confirmed that this may be what we have to expect.  We have a third estimate coming today.  Our budget is $15000 for the body, so I'm not sure what we are going to do.  Kenny Mudd thinks if we do the floors and sandblasting he may be able to swing that.  He seems like a really nice guy, and I would like to work with him.  He is close and local and we have heard good things about his work.  Jay (Jill's brother) has offered to do at least the floors to help with cost, and maybe the whole body work if we have to go that route.  Jay had good training from Hoss, so I know he will do a good job.

On TV you only see the quick take apart and finish.  In real life there are a lot of pieces to take apart and organize, and with one person, it is hard to stay motivated at this stage. It is all reverse progress at this point.  Some of the frame is in worse shape than I thought with more repairs needed where the body mount bushings go.  I shouldn't be surprised since the Chevelle is older now than when I started working on my '53 Chevy truck. (Wow, hadn't thought about that, but when the '53 was started ~1988, it was a young 35 years old at that time.  The Chevelle is almost 47!) I'm really hoping to get the frame to sandblasting soon so I can seen some forward progress to feel like something is getting done.  It's just me so far; I sure with I had that behind the scenes TV crew.  Hopefully I will be through this stage soon.

Saturday, November 5, 2011


It's been a busy week at work, so not much progress on the Chevelle.  The pile of parts is slowly getting larger, and I think about as big as it will get.  At least with old parts!  I removed the heater core early in the week, which hopefully if money holds will get replaced with a Vintage Air system.  It will be nice to have A/C on cruises in St. Louis.

I started ordering a few parts, like the radiator support and lights, but I'll mostly wait until the body is back to order the bulk of new parts.  There is a lot of trim on 50's and 60's cars, and I suspect that will take a large chuck of the budget, unless Hoss stored away lots of pieces in the garage in Marion.  Keep your fingers crossed he did.

Today I removed the dash, and hopefully will clean up a few loose end, parts with broken bolts we didn't get to last weekend.  We have a big load for the sandblaster to clean up before I can powdercoat. Olive came out for a few minutes to inspect the car. I don't think she is impressed at this stage, since it did not take her to the park.


 Here is the dash wiring.  Literally, this is 90% of the wiring in the car.  Only the front and rear lights are not shown.  Even with this little, I probably will only use the fuse box.  Everything else needs to be matched up to the LS1.  Isn't it amazing how little electronics were used in the 60's, but so much more than the 50's.  I find it interesting the mix of technologies showing up.  My '53 was all metal and bakelite, plastics weren't in use much at the time.  In '65, there is a mix of aluminum, stainless, steel, and plastics.  You find a few ribbon wires, but still made in a large scale. Nothing like you would see today.  The radio has to weigh five pounds, and it only gets AM.

Everyone asks me how will I get everything back together.  I often wonder that myself, but it's amazing how few parts are needed for a car.  This is all of the interior and some of the trim laid out in my basement.  It isn't that much, and most of it is cosmetic.  Of course, if anyone wants to know what to get me for Christmas - Chevelle trim parts is a good place to start :)
 Here is the interior with just about everything out.  Ready for the body to come off the frame, or at least very close.  Notice the manual vent in the driver's footwell.  If you want air, you don't just push a button.