Coming together

Coming together
Getting close to paint

Sunday, September 16, 2012

Taurus seats in a '65 Chevelle


A few weeks back I gave a preview of the 2008 Ford Taurus seats I purchased to go in the Chevelle.  Why new seats?  Well, they are heated, power, leather, have headrests and don't flop forward.  Safety.  And I must say they are very comfortable.  We found ourselves sitting in the seat in the living room watching television instead of sitting on the couch.  The scary part for me is the wiring - there are computers for the airbag/active restraint system, seatbelts, seat memory, heater, and all power adjustments.  I did get a wiring diagram for the passenger seat, but still need one for the drivers seat before I can put it in when the body is ready.  First pictures give you and idea of what I have to deal with. Overall not a lot of modifications needed to make the seats work, but by no means a direct bolt in.  The seat position sensor (middle right) has to go; there isn't room for this the way I chose to mount the seats.
 The Taurus seat has a large foot at the front that had to go. The floor is fairly flat where the seat mounds, so I don't need this height.

The solution - cut off the foot.  Below is the passenger side, for the drivers side I cut it more at an angle with the front taller than the back.  This seemed to fit the contour of the floor a little better, but may have dropped the seat a little too low.


To get the proper mounting to the floor, I welded a nut to a piece of steel (leftover from the trunk pan where it mounted to the frame) and bolted that to the floor.  This way I know that the bolt is lined up.  Next the seat was placed on top, and the rear bolted in place.  Factory holes lined up for both of the rear seat bolts, they just needed drilled so I could change them from a stud to a bolt through the floor.  Confusing, but if you are doing a swap, it will make sense.  With the seat in place I put a few tack welds on the plate, and took the seat back out.


With the seat on the bench, and the plate tacked on, I could finish weld knowing the mounting plate was in the correct spot. Below you can see what the finished plate looks like welded in place with the mounting nut.  I used nuts in front, because with the foot design I used there is no way to get a wrench in place.  I have no worries about the strength of this part.


The plastic trim was now too long to fit with the seat sitting flat to the floor.  Both sides needed the portion that sticks down cut off.  A little Dremel time and you really won't know.  It should sit right on top of the carpet when finished.  
There was also a mounting stud at the back of each track that needed to be removed, to allow the seat to sit flush.  Here it is cut off, just forward of the rear two bolt holes.  I suppose one could have drilled holes in the floor for the mounting studs to sit to help align the seats, but then there would be more holes in the floor.  Easier in my opinion to cut them off rather than put more holes in the floor. 

And, the final product.  First picture has the seat all the way forward, easier to get the rear bolts in.  Second picture has is part way back, about perfect for where I would sit.  It was good to fit it in both positions, to get an idea of where to cut the plastic trim since the seat drops down as it goes back.  The seat does have a height adjustment so I could lift it up if it sits too low, but I think it will be good.  Eyeline is just above middle of the windshield, and probably enough room for a helmet between the top of my head and the headliner. The headrests are off now to make it easier to fit, but will be on when I drive it.  I think the boxiness of the Taurus seats fits well with the style of the '65. The steering wheel is centered perfectly, and the shifter falls in a nice spot beside the seat.
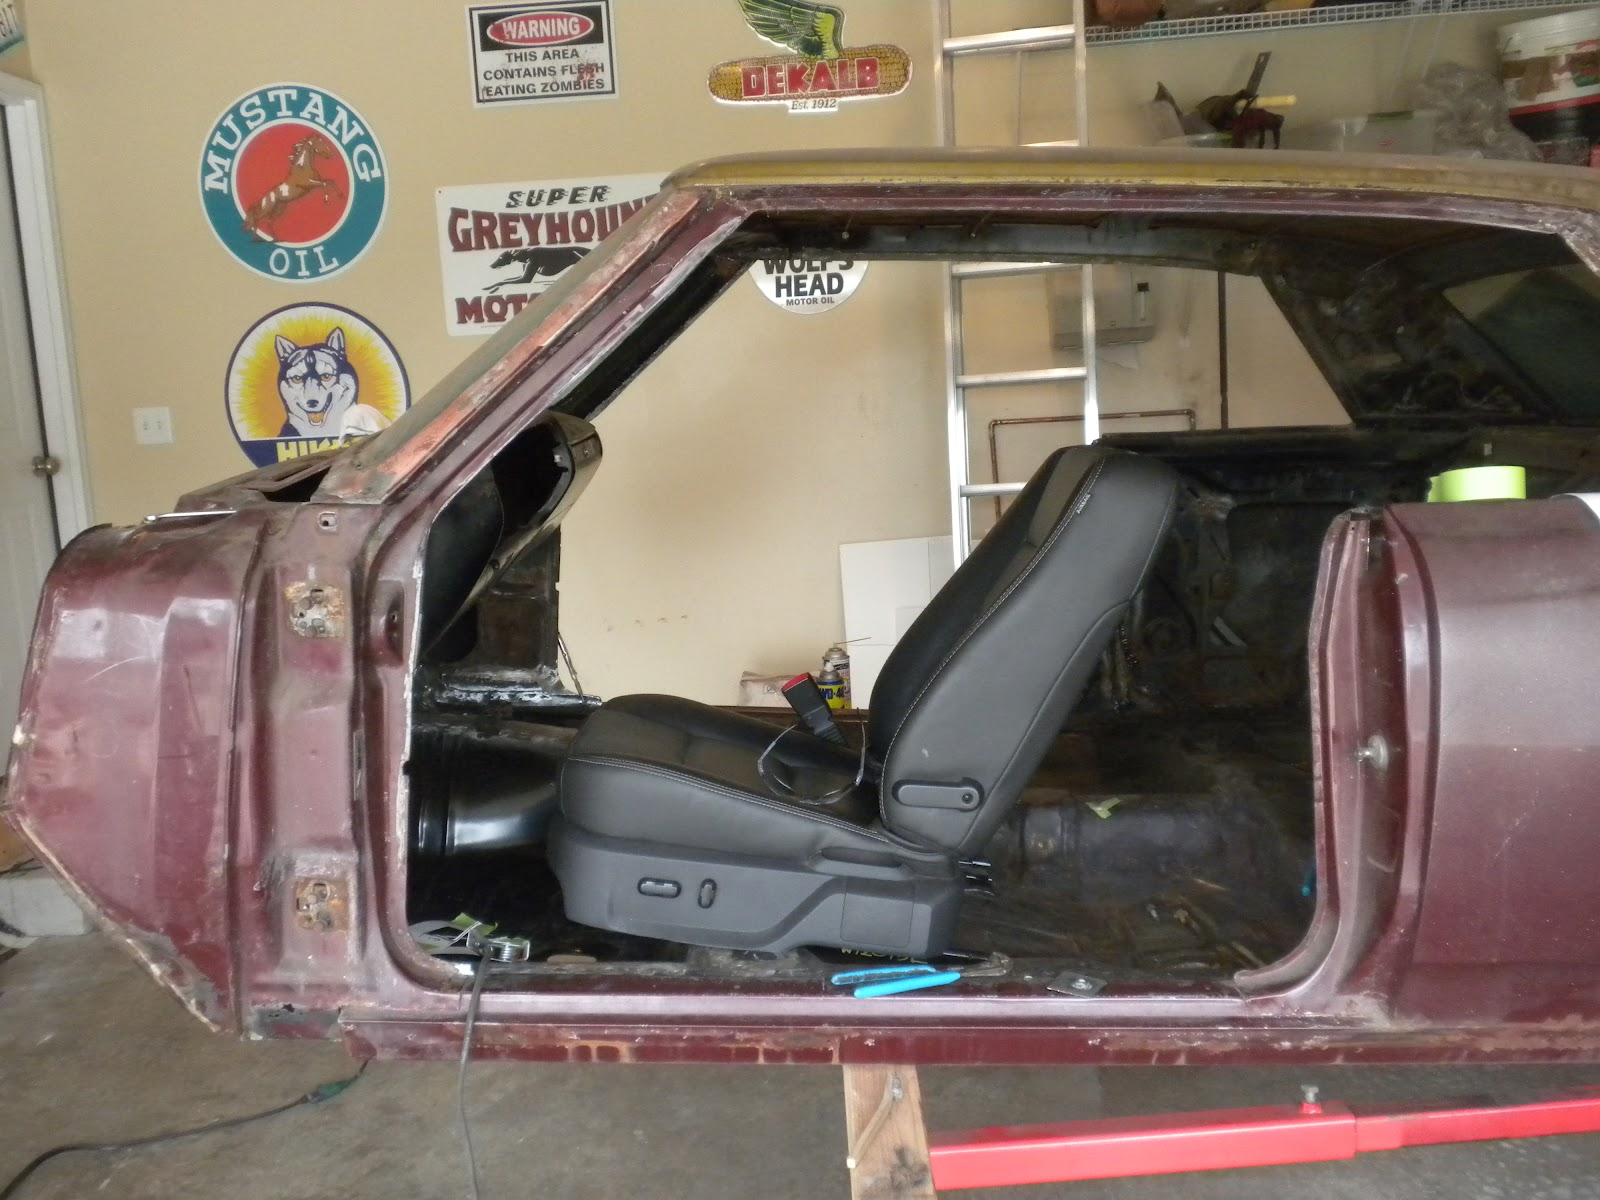


Token picture of the passenger side.  A very close look will notice the plastic trim isn't cut yet in this picture, and is holding the front of the seat up.

Next project is to get the body back on the frame, bolt it down, and fit the center console.  For kicks we sat it into place over the new shifter hole.  It sits nicely about 8" back from the original position.  Only problem is the shifter boot is offset to the left, notice that you can only see about half the opening below the console.  I either need to get an offset shifter and move the hole, or try to mount the console farther right.  There is room, but I refuse to cut up the console since they don't make reproductions of this part.  The easy option would be to get a late model console with the shifter in the center.  This might also give me cupholders and center storage bins, but easy doesn't seem to be my way of doing things.  Maybe I need to get over this, but the stock console looks so good in there.

Sunday, September 9, 2012

Finished floor

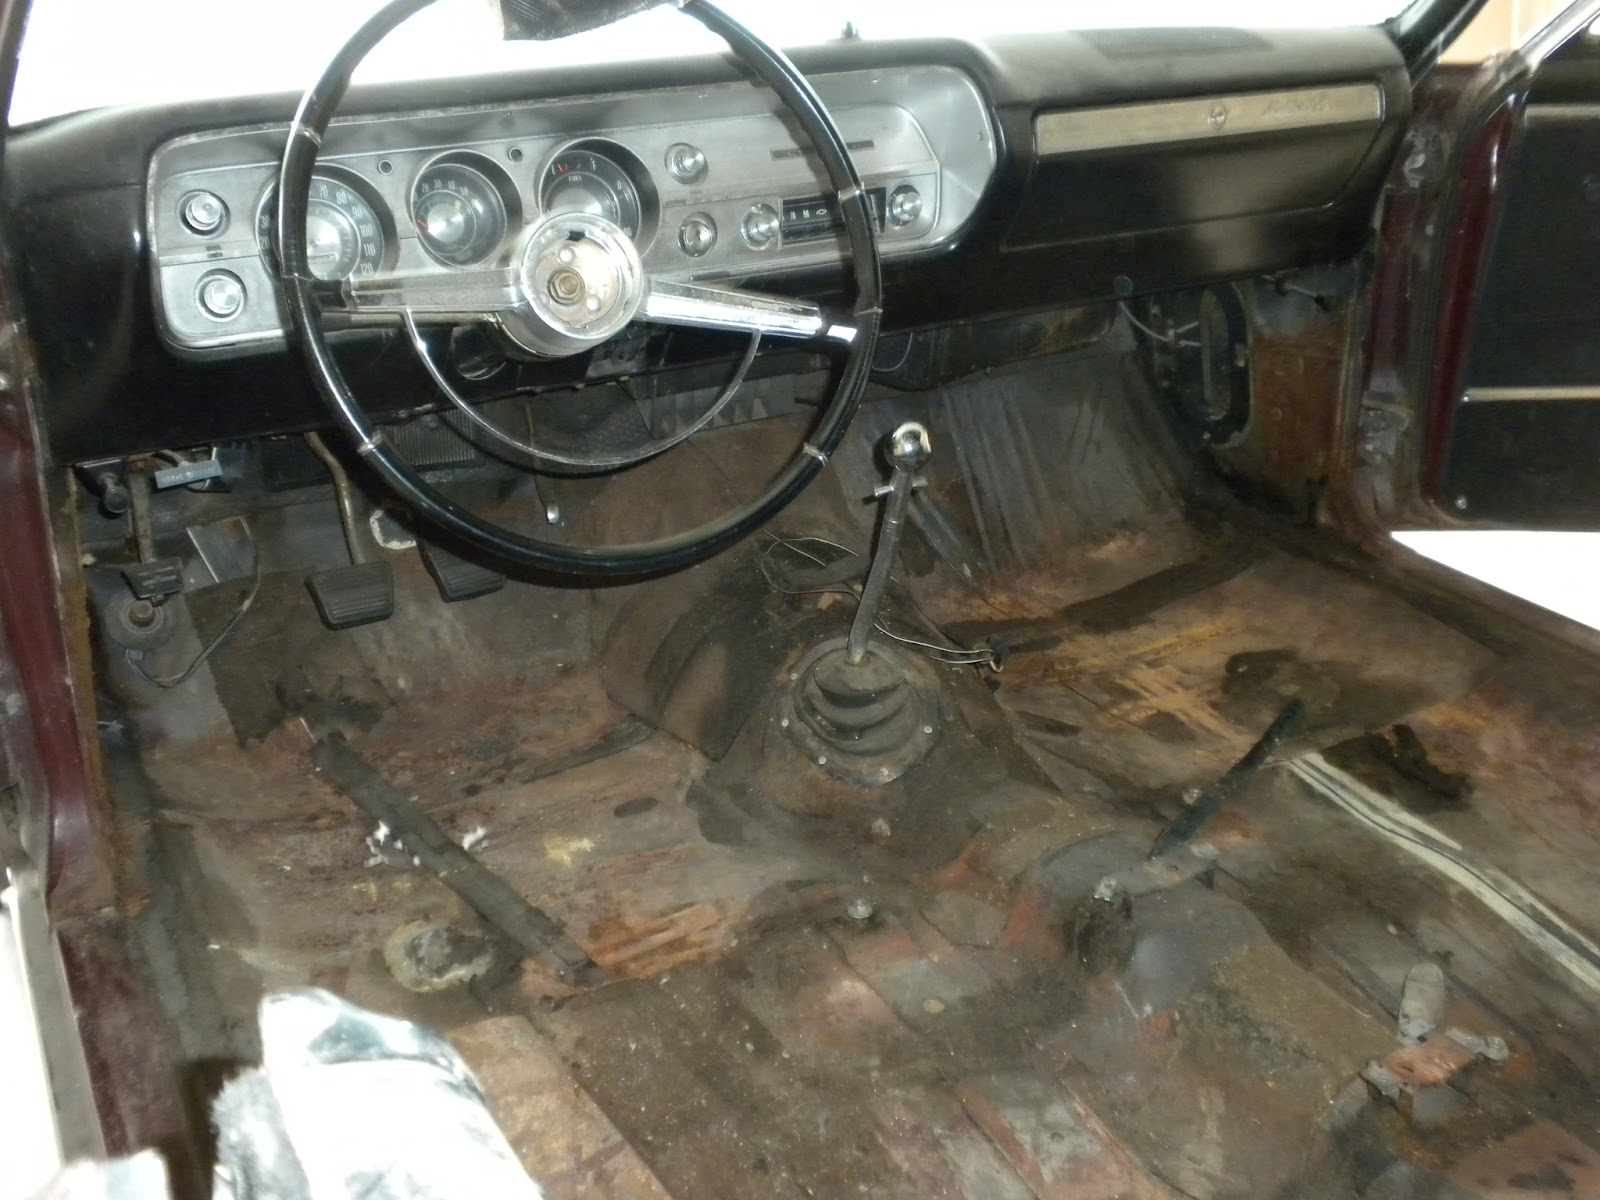
It's been a warm summer this year, way to hot to spend out in the garage with no a/c (or even a/c with no ventilation!).  Now that the weather is cooling down, I had a chance to get back to finishing the floor.  To remind you, this is what I started with.  What you can't see well are the holes in the floor.  It also needed the transmission tunnel widened to fit the T56.

This winter we replaced the floor pans, and I have been waiting to finish off above the transmission until I could match the tunnel to the motor in the frame.  I ended up adding about 4" between the floor pans to get the extra space for the new transmission.  The tape marks where the shifter came through for the T56 - hard to tell but trust me, it is about 8" further back than the Muncie 4-speed, and centered vs. offset to the drivers side.  My first plan was to remove the original panel that surrounded the Muncie, and adapt that to the new hole in the floor.  After talking through options with my brother-in-law Jay, we decided that it might be best to cut out the entire area and build one new piece to fit the shifter, rather than trying to make old parts fit. The shifter solenoid also sticks out more on the left side, so a new part allows me to get the extra space.
Using a piece of paper, I mocked up a template to copy into steel.  
It looks ugly, but this is what it took to make the final filler piece.
And finally, after hours of hammering and tweaking into place, it is welded in place.

I used the Muncie plate to mark the shifter opening, so I can use the stock shifter boot around the opening.  I will need to move the console over to fit the center shifter, but there should be plenty of room with the seats I have chosen. I think the final product turned out okay.  Once everything is painted, the seams sealed, and sound deadener and carpet over the top, it should look nice and smooth.


 For comparison, here is a picture from a similar angle to the before, so you can see the repairs.  Next up will be fitting the drivers seat and center console, then off to the body shop for work on the shiny side.


Saturday, July 7, 2012

Seat selection and car shows

As I have been getting closer to finishing the floor, I decided it was time to make a decision on seats.  I will need to weld in appropriate attachment points, so it's best to do that now before paint and body work.  I do have a good drivers seat, although it was moldy and smelled of 37 years of sitting enclosed in a car outside.  The originals also have no headrest, have a low back, and no lock to keep them from flipping forward.  Not exactly built for safety.  The back seat is in perfect shape, so I am hoping that with Febreeze and some air it will be useable.  That leaves me needing to find front seats that are modern, but somewhat match the original seats. Quite a challenge.  


Several classic GTO's have gone with the modern GTO seats.  They fit well, are comfortable, and have good side bolstering. I was thinking this would be a nice combo to have with the GTO engine as well, although the GTO logo on the seat back was a little offputting.  Replacement seat covers can run upwards of $2000, so recovering really isn't and option on my budget.  We were fortunate to see an El Camino at the Super Chevy Show where they had used the LS2 and entire interior from a GTO.  This must have been a ton of work to get the dash and everything else fit into the El Camino.  More on this El Camino below. While I love the seats, the style is just completely off.  In person they remind me of an overstuffed couch.  I just don't think this works well unless you use the complete modern interior.  Unfortunately, these had to come off the list of options.
My next find were Nissan 350z roadster seats.  A rare few came with buckets with a four panel back, maybe a little closer to the originals.  There is a lot more styling to the seat, but I thought it would be a good fit.  I lost an auction on eBay, and couldn't find another set like this anywhere. Back to the search.

Here is a picture of original 1965 Chevelle interior, maybe easier to see what I'm looking for here.
I came across a set of 2008 Ford Taurus seats, with power, heat, lumbar and airbags.  Obviously airbags won't be usable, but the heat will be nice.  They have the four panel back reminiscent of the Chevelle interior, with a nice boxy shape.  I think these will be a great match to the original interior while adding leather, power, and headrests.  It will be interesting to see if people notice they are not stock; I know Chevelle people will pick up instantly, but I hope they are close enough it isn't obvious they are not originals.  There is more bolstering than the originals (which have none), and they are very comfortable.  The picture really doesn't do them justice. One problem with sedan seats is they do not have a flip lever like seats from a coupe, so to get in back I will have to use the power functions.  How often do you use the back seat in a coupe anyway? I'm quite happy so far, I just need to see how they fit.  The scary part is underneath - I counted 21 wire connections on the passenger seat and 39 on the driver's.  There are two computer modules on each seat to control the electronics.  I was thinking that a seat should just need power and maybe a ground.  There are more electronics in one of these seats than the entire Chevelle had in 1965.  Crazy when all a seat is is a place to put your butt. When it cools off I will see how these fit in the car.  Looks like there will need to be bracket adjustments at the front to make them fit the flat floor; the rear just needs studs welded in at the right place.

A couple weeks ago the Super Chevy show came to Gateway Motorsports park.  I thought it would be a great place to talk with Chevelle owners and get ideas for mine.  At least we came away with the latter.  It was a hot day with lots of great classic drag racing, although they were only running the eighth   mile. I guess just so they could run through cars quicker. We found this beautiful early fifties Chevy truck at the show.  I love the color and the subtle modifications the owner did.  I tried asking the owner about the color, and his response 'black cherry'.  And who makes it? 'Dupont'.  I don't get it - why bring your car to a show and be rude when people show interest in it?  If you don't want to show off and get questions, then stay home.  Isn't the purpose of a car show to show off and brag about how awesome your ride is?  Three words were all I could get out of this guy.
 There were only 2 or 3 1965 Chevelles at the show, interestingly none managed to get the grill painted right for an SS. This is getting to be my new pet peeve on 65's.  Come on, it's not that hard - three skinny bars above and below the center bar should be black.  That's it.  No more, no less.
 This was a nice two door post car - it had the 138 VIN for an SS, but I did not think that Chevy made SS post cars (see the B-pillar int he second picture). Mix of SS and non-SS trim.  Color looks like original Madiera maroon, but it had some metallic, so not factory.  I wanted to find out more about this car, but the owners weren't interested in chatting.  Again, I don't get it.  If you don't want to show off your car, why are you at a car show???

 This was one of the nicest 1965 SS cars there.  Love the license plate 'Drive more hybrids, I need fuel'.


I only saw three LSx swaps at the show, one in the El Camino, and two in first generation Camaro's.  All looked like nice clean swaps.  The Camaro below looked like a great daily driver with probably an older swap.  A couple guys were walking by as we were looking complaining about it - why would you put an LSx in a Camaro?  They didn't like how the motor wasn't polished - the exact comment was 'They must have just pulled it out of a wreck and dropped it in the car'. I thought it looked like the owner was driving and enjoying the car.  More power to them.  This was the first negative comments I have heard from anyone about this swap.  I'm guessing they have never driven an original V8 and compared that to the LSx. I have nothing against Chevy small blocks, but for drivability, you can't beat modern engines, and why would you not want to drive your muscle car everywhere?


Monday, May 28, 2012

Not so Amish body raising

Hot day today in St Louis, what better time to work outside?  With the frame done, engine mounted, and steering sorted, it's time to find out how the body fits.  With help from a half dozen friends (Kurt, Amanda, Matt, Rob, and Scott) it felt a bit like an Amish barn raising with no tools, although I guess they wouldn't touch cars, so it's really nothing like that.  Thankfully a simple job with six people it probably took less than a minute. 

Here is the frame sideways in the garage, with the body directly behind.  Close fit, but it does fit sideways in the garage. Many hands makes light work lifting the body up and onto the frame.  Likely we will have to do this a couple more times, so it's good to know it doesn't weigh much even with the windshield and backlight still in.


 Here are a few pictures of the fit around the engine and transmission.  The body needs to slide forward about an inch (see the second picture below), which will tighten up the big gap between the motor and firewall.  It should sit just about right with the body in the correct position.  The top of the transmission is hitting just a little, so once that is clearanced the body will easily move in to position. It's exciting for me just to see the body back on the frame, even if just for a few days. Progress!

Next time, remember to put the computer forward on top of the motor.

 Lots of clearance for the floor and firewall to the header.  I wish the clearance to the frame was this good.  Probably still need some good heat shielding around the catalytic convertors, but that is a long way off to worry about.
 Here you can see where the firewall hits the transmission.  We left plenty of metal so it should be an easy job to cut more out, and use the new floorpans.  We may need to add about 4" to the middle to get the necessary clearance.  It won't hurt to have a little extra either.
 Here is where the shifter sits.  I was guessing where the seat goes, and I think it will be in a very comfortable position, not too far back in the chassis.  Plenty of room around the driveshaft as well.  More than anything it is a bit unnerving to know what is spinning just the other side of a thin piece of sheet metal.
 It's a little easier to see in this picture where the shifter needs to move to.  Look where the two ridges are at the front of the floor, and where they are in the old floor plan on top, 4-5" back from the original position.  I think we will use the original floor pan around the shifter to fill the gap, which just leaves a small strip in front to fill.  I don't think it will be a bad job, but we have to mark everything, then take the body off again to cut and weld the panel in.  Hopefully I can find enough people around to test fit the panels before we weld them in solid and mount the body to send everything back to the body shop. Seems like a lot of extra work, but the more test fitting, the better the final product will be.

Sunday, May 13, 2012

Steering clearance at last, oil pan v. 3

 Third times a charm, right?  We started with an LH8 oil pan (used on Hummer, etc) that fit great over the frame until I tried to fit the tie rods.  The tie rods hit the pan pretty solidly, which would be a bad thing if you cranked the wheel and cracked open the oil pan.  Think catastrophic engine failure.  Thankfully, Mast Motorsports just came out with a case oil pan that addresses this problem.  There were other cheaper options, but none have the oil filter mounted on the pan.  My goal is to stay closer to stock, so I didn't like these options.  Mast is pricey, but looked like it would work. The LH8 pan is in the back in the picture below, Mast at the bottom.  They had to put reliefs in the oil pan to allow for the oil tube and the windage tray.  It looks like every attempt was made to make the front of the pan as skinny as possible.
 The LH8 pan is on the right below.  The other point to notice is the rear of the pan isn't as deep on the Mast pan compared to the LH8.  Why does this matter?
Well, compare the next two pictures. First is with the LH8 pan, second is with the Mast pan.  See the LH8 pan sticking a couple inches below the crossmember?  If you hit a speedbump or hole in the pavement, the first think you will hit is the oil pan.  Cast aluminum doesn't bend when hit, so this could result in total loss of oil if it gets hit.  The Mast pan solved this problem as well.  I HATE buying parts twice, so learn from my mistake and buy the Mast pan first.  I do have an LH8 pan for sale though...

 Even with the Mast pan, we had to shim the motor mounts to get complete clearance with the tie rod ends and the oil pan.  We used three skinny washers between the motor mount and the block to get clearance.  We probably could have got away with one or two; with three there is a good 1/8" clearance  between the oil pan and tie rod ends.  I figure if anything settles or moves around the extra clearance is good insurance, so we left all three washers in place. Carquest built a high pressure power steering hose for me to connect the Camaro pump to the Jeep Grand Cherokee box.  It's a simple part, but critical and looks like it was designed to fit.  Maybe I'm easily amused, but there is a lot of satisfaction to get these custom parts to fit and look like they aren't custom.  Next step for me is to mock the body on the frame, and finish the floor around the shifter. We're not done with the custom bits by a long shot, but if the steering shaft fits with the headers, we will be in very good shape with mounting the LS1.

Sunday, April 22, 2012

Frankenstein power steering

This week I finally had most of the parts to get the power steering installed.  It struck me as I was ordering parts what a frankenstein setup this is - 2004 GTO motor, 2001 Firebird pump, 1998 Cherokee steering box, 1965 Chevelle steering parts.  Somehow it seems to be working together.  I purchased the bracket from Speedway motors that get the alternator up and out of the way of the steering box (see the last picture).  It also moves the steering pump to the top of the motor.  My first surprise was to find that the GTO pump is different.

The bolt pattern is wider on the GTO pump, and the pulley is smaller and steel with an external reservoir.  The Camaro/Firebird pump has the reservoir mounted, and a larger composite pulley.  Note the composite pulley doesn't have the holes to remove the bolts, so I had to get a puller to clean up the Firebird part and put the right bolts on.  Thankfully after this the Firebird pump does bolt directly to the Speedway bracket, and it puts the pulley in alignment with the alternator and the crank.  

 In the picture above, GTO part is on the left, Firebird part is on the right. Below, the GTO pulley is on top, and the Firebird part on the bottom.  I think either pulley might work; I went with the composite pulley since it matched the pump and was a little lighter weight than the GTO.

The Speedway bracket came with a new belt, but it was way to short to work with or without the idler pulley (up and to the right of the crank pulley).  I thought that the idler pulley would help keep the belt from wobbling, so I used the stock GTO serpentine belt (new of course).  It fits great, even with the alternator and power steering in a completely different orientation.  It's hard to see in this picture the bracket holding the idler pulley that used to also hold the alternator.  I cut off the from two arms that held the alternator low by the power steering box since they served no purpose.  I have to admit it felt great to get this together; I was worried with all of the different models and years that this would not work, but somehow it all comes together.  How anyone figured this out I don't know, but thanks to the internet for providing the information!  I do have to lengthen the alternator wires about six inches to get them to fit, and have ordered custom power steering lines to connect the pump to the steering box.  Maybe someday I'll get shiny parts to make this all pretty, but my focus now is to move forward.  The pitman arm is on backorder; once this arrives the steering should be done up to the column! Next I need to start thinking about how to route the brake lines...